TL,DR version: I’ve made a new wax seal design, an Easter Egg! This is specifically designed to visually pop up out of the page as if it were in the shape of an egg, adding a distinctive flair to all things Easter related.
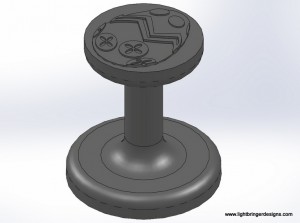 Selling high end sweets for the holiday, or dressing up as the Easter Bunny? This is the exclamation point you want on your packaging or marketing materials. Who else has that? Or maybe this is just your favorite holiday, or you think the perspective trick is just that good…
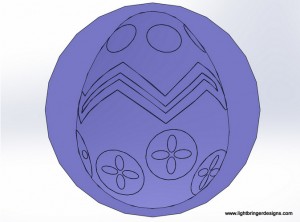 Maybe by now you just want me to shut up and take your money. If not, continue reading as I geek out on 3D geometry…Getting all of the details to distort in just the right ways is a serious challenge. Notice how one of the flower shapes is almost a circle, but as they get further off center, the ellipses get more eccentric, and fall off the edge. The zigzag line isn’t actually a line – you can’t really draw a straight line on an egg. If you draw like lines of latitude or longitude, they might look straight from just the right point of view, but stray from there just a little or turn the egg, and it becomes a curve. If we were drawing on a sphere, a line becomes a circle, but this isn’t a sphere, so we get something called a spline. Splines are basically funny curves that aren’t straight lines, circular, elliptical, or parabolic. They are similar to compound angles, in that they are complicated and difficult to work with, and usually to be avoided where possible. Here, it’s the only way certain parts will look right.
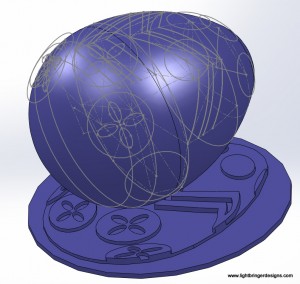 That’s what it looks like with most of the planning sketches visible.
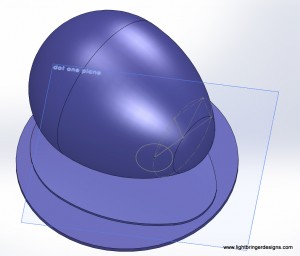 We’ll start with the dots at the top. All the details are based off a revolved egg surface. Then I used a plane to define the height of the center of the dots, and sketched on there to select points on the surface evenly spaced. Then for each point, I created a plane tangent to the egg surface at the point, drew a circle on the plane, and projected it onto the flat plane of the seal. This is a way of avoiding splines, as the projected circles form ellipses. It also makes sense, as if the dots were made on the egg with a circular rubber stamp, the outline would be a circle when viewed from the normal of the center of the dot.
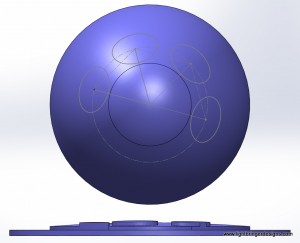 That’s how the sketches look from the “top” of the egg.
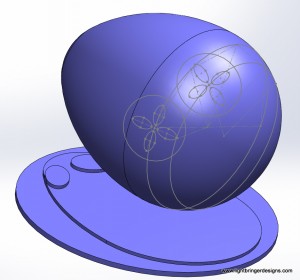 The bottom dots work much the same way, except there are two planes, for dots at two different heights in a zigzag pattern, with ellipses to make them look like simple flowers. Because the bottom of the egg is bigger, there is more room to play with, and having the same element at the same size but different heights on the egg furthers the illusion of depth by showing off how they are distorted differently.
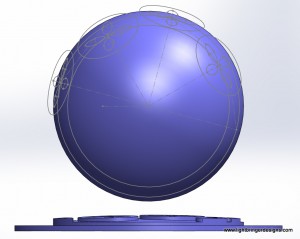 This is all the flower petal sketches in place, as viewed from the bottom. Then comes the tricky part with splines…
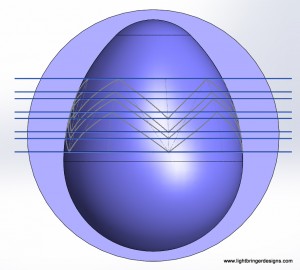 The zigzag pattern is actually two raised “fat” lines with a “skinny” line between that isn’t raised. This requires four lines to generate, and each has a different height at the top and at the bottom, so there are 8 reference planes to keep track of. The highest and lowest have radial sketches as we saw to set up the planes for the dots and flowers. The most important tool used here is called “spline on surface.” This let me draw reference splines between anchor points, and let my 3D sketched splines go to points where those guide splines intersect the right plane. Notice that from the perspective above, the points of the zigzag towards the middle are almost vertical, but towards the sides the curve a bit more – that’s key to the illusion, and it happens automatically by using longitudinal splines as references.
Once the shapes are drawn up in space, it’s a matter of opening up a sketch on the seal’s surface, converting entities to the flat plane, and then cleaning up all the details. You will have shapes that went around past the silhouette edge, showing stuff on the “back” of the egg – those need to be trimmed away. Also, towards the edges, lines tend to bunch up to become a blob. Your artistic medium will determine at what point is it too much of a mess that you just make it one solid blob. Then, hide the revolved surface and all your reference entities, and you have an egg fit for Peter Rabit.
